
Adding donations received offline (like cash, cheques, or bank transfers) is a great way to ensure your campaign's total accurately reflects all the support you've received. This guide will walk you through adding individual offline donations and bulk importing historical data.
Skip Ahead To
Adding an Offline Donation to the Campaign
Adding an Offline Donation to a Profile
Bulk Importing Offline Donations
Adding an Offline Donation to the Campaign
Follow these steps to add a general offline donation that contributes to the overall campaign total, but isn't assigned to a specific fundraiser.
- Go to Campaign → Donations
- Click on the Create Donation button in the top-right corner
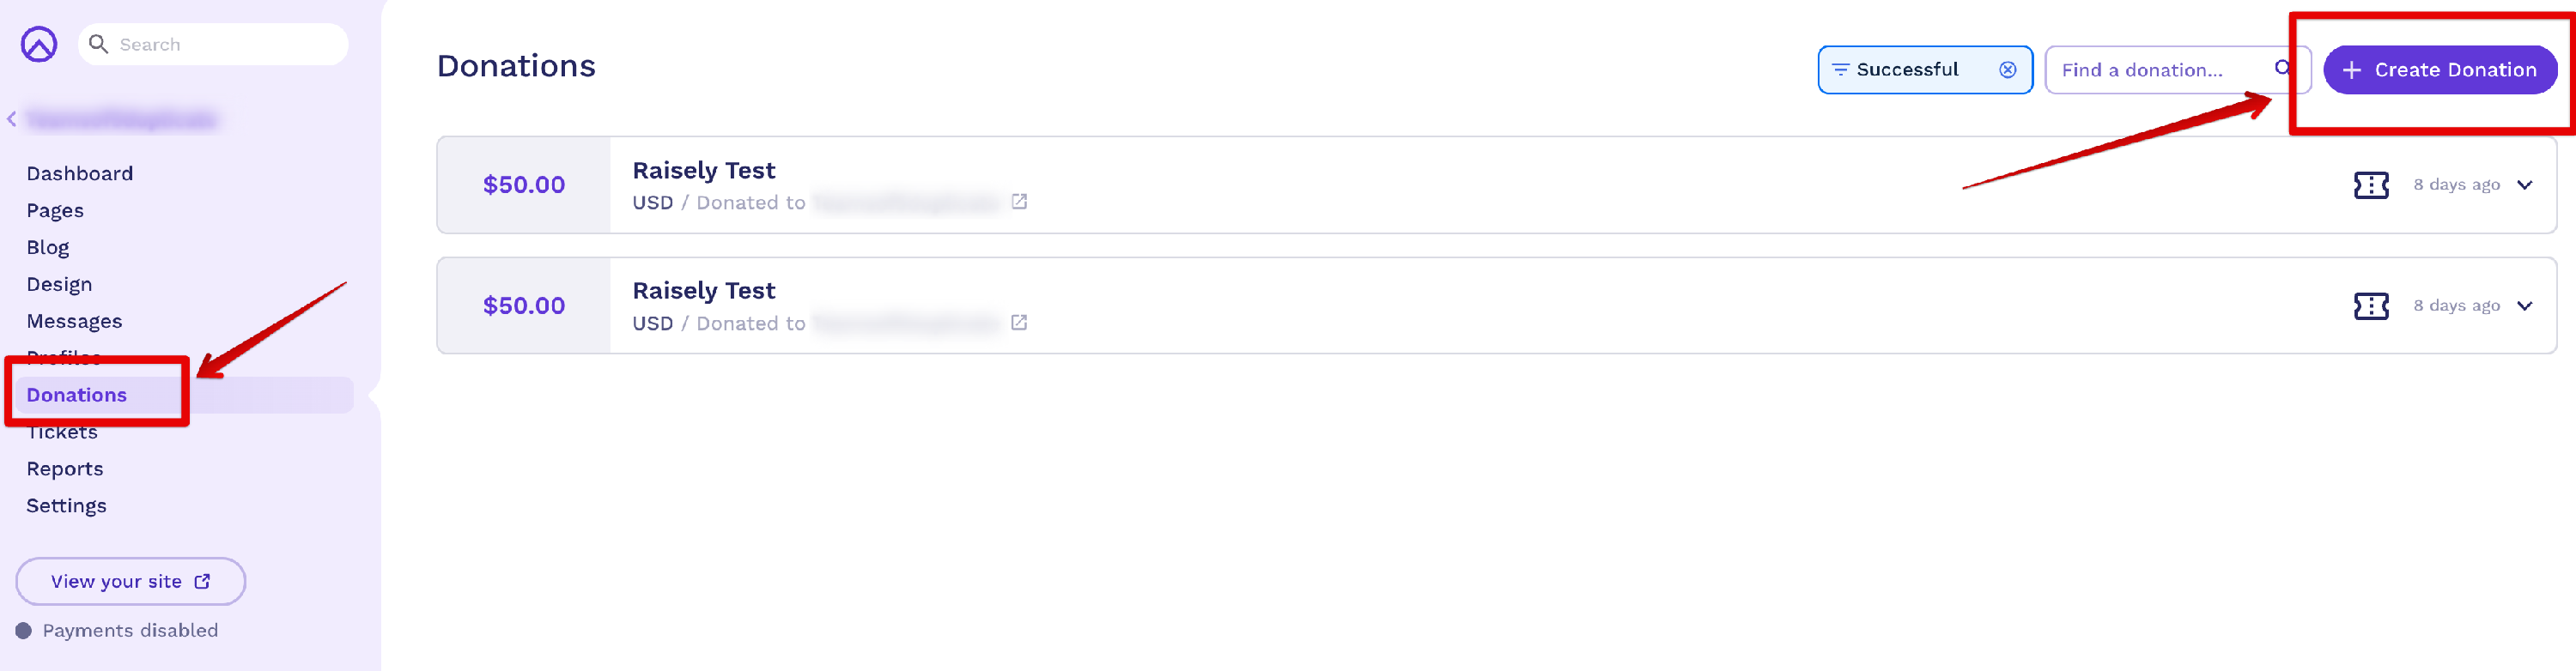
- A pop-up window/modal will appear. Enter the details of your donation, including the donor's information and the amount. The first and last name fields will be used to fill in the donor name field on the PDF receipt generated for the donation.
- Click on Save Donation to finish. The donation will now appear in your list of donations and contribute to the campaign's total.
💡 Important: Adding an offline donation does not automatically send a receipt to the donor. You will need to open the donation record and click Resend Receipt to trigger it manually.
Adding an Offline Donation to a Profile
To attribute an offline donation to a specific individual or team fundraising profile, you can also follow these steps.
- Go to Campaign → Profiles
- Find the profile you'd like to add the donation to, and click on it to open the profile record.
- Find the Recent Donations section on the right side of the screen and click on the + icon:
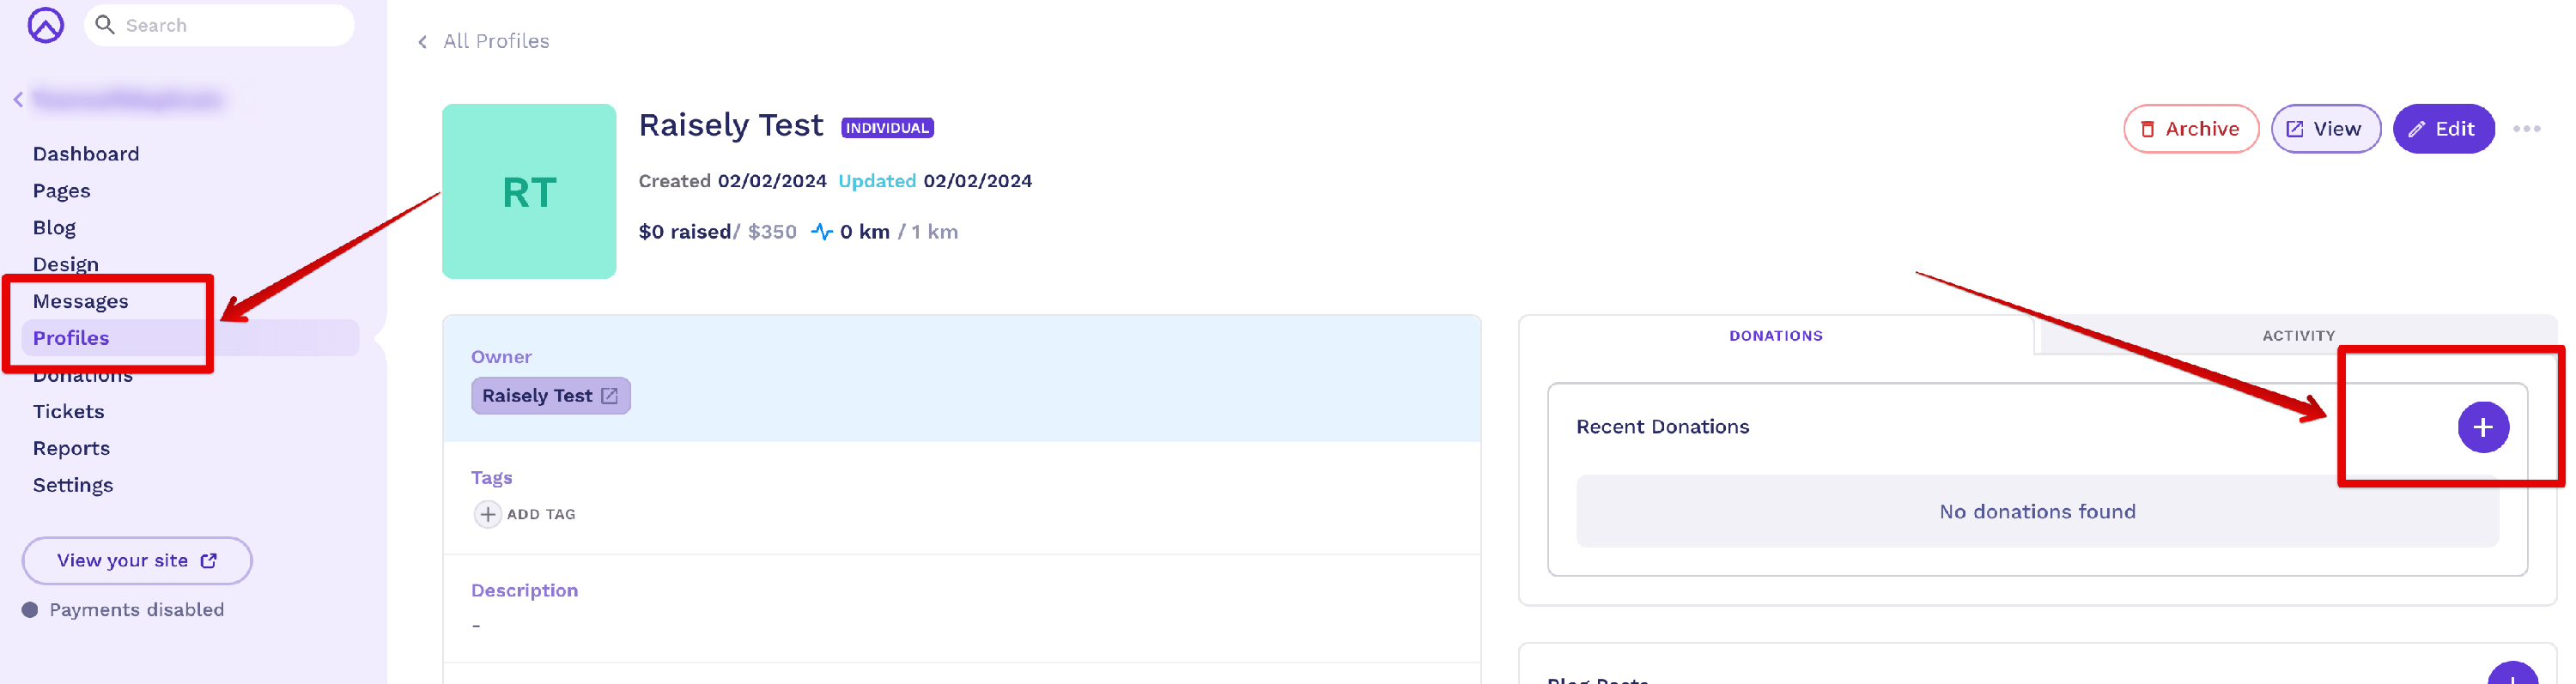
- A pop-up window/modal will appear. Enter the details of your donation, including the donor's information and the amount. The first and last name fields will be used to fill in the donor name field on the PDF receipt generated for the donation.
- Click on Save Donation to finish. The donation will now appear in your list of donations and contribute to the campaign's total.
Bulk Importing Offline Donations
If you have historical donation data you'd like to import and assign to a campaign or specific profiles, we can help. The entire process generally takes between 7 to 10 business days once we've received and verified your data.
Step 1: Fill out the Import Template
To start, you'll need to download and complete the One-Off Donation Import Template. As you fill it out, please note:
- The email field is mandatory and must be unique for each donor. If you don't have an email, you can use a placeholder using a valid domain such as one that you own (e.g.
donor+1@customdomain.comordonor+1@raiselysite.com). This is required because the import also creates a user record for each donor. - The Donation Date, Donation Time, and Donation Time Zone fields must match the format in the template exactly.
- Donation Amount should be in dollars (e.g., 50.00).
- If a donation should be assigned to a specific profile, ensure the profile name is included in the CSV file. For general campaign donations, you can leave this field blank.
Step 2: Create the Campaign (and Profiles if relevant)
Before submitting the template, ensure the campaign and any fundraiser profiles listed in your spreadsheet already exist in Raisely. You can bulk import fundraiser profiles if needed.
Step 3: (Optional) Add and Activate a Payment Account
If you plan to use this campaign to receive online donations, you should connect your payment account and set it to active before the import. This ensures all your donation data appears within the same dashboard. For more details, see our guide on Setting Up Payments: The Basics.
FAQs
Do offline donations automatically receive a receipt?
No. To prevent accidental emails for donations already receipted offline, Raisely does not automatically send receipts for manually entered donations. You must send the receipt manually by navigating to the Donations tab, clicking on the specific donation, and selecting the Resend Receipt option.
Can I edit an offline donation after adding it?
Yes. You can find the donation in the Donations tab, click to open its record, and you will be able to edit the details you entered. Remember to save your changes.
How do I handle donations with no email address during a bulk import?
The email field is a mandatory requirement for creating a user record. If you do not have an email address for a donor, you must use a unique placeholder with a valid domain, such as donor1@yourcustomdomain.com, donor2@raiselysite.com, etc. This allows the import to proceed and you can update the record later if you get the correct email address.
Cannot find the support guide you are after? Head on over to our YouTube channel 📺 for more creative content to help you go further. You can even leave us comments, suggesting new content ideas 🤯
Comments
0 comments
Please sign in to leave a comment.